How to Teach the Water Cycle
Your preschooler isn’t too young to start learning about the water cycle.
Check out these fun ideas to help teach the water cycle.
This article may contain affiliate links to products that may help you when homeschooling preschool.
Why Teach the Water Cycle
Water is all around us.
Your little one interacts with it daily from drinking her water to taking a bath.
Throw in jumping in puddles or ice skating and she is using water to help entertain herself.
Help her to understand where water comes from by teaching her about the water cycle.
When kids know that water can’t be made and that it needs to be used wisely, they tend to view it differently.
It may surprise you that after you teach the water cycle that your little one won’t be as wasteful with the water.
Learning through doing is how preschoolers learn so of course teaching about the water cycle is going to be no different.
As always, be sure to supervise when you little one is interacting with water.
Teaching the Water Cycle
Play in the Rain
Playing in the rain is a great way to have your little ones experience first-hand precipitation.
They can use all of their sense to interact with the rain.
By looking up at the sky, they will be able to see the grey clouds and the rain falling from the clouds.
Talk about what they notice about the clouds and the rain to help build your children’s knowledge.
What a fun way to teach the water cycle!
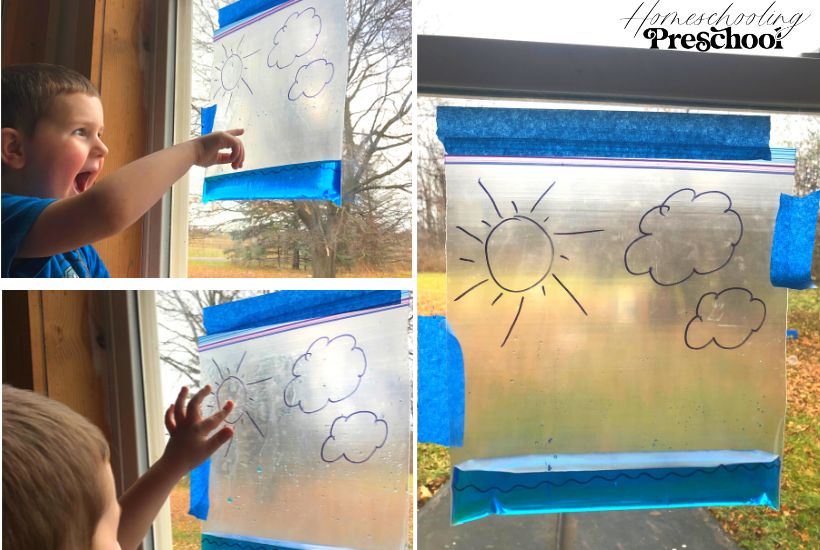
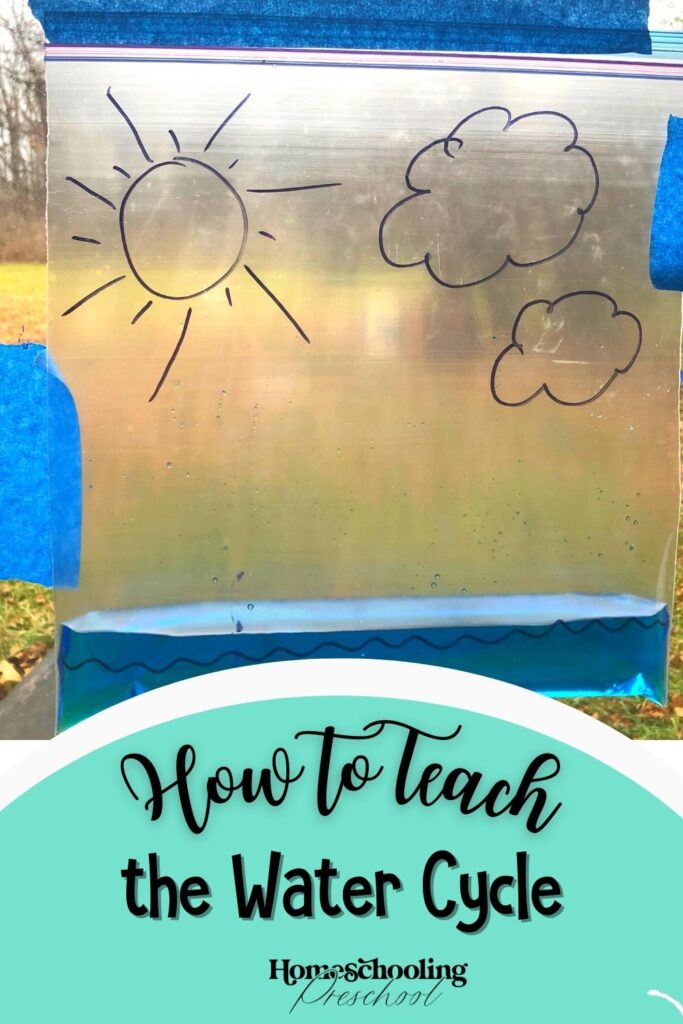
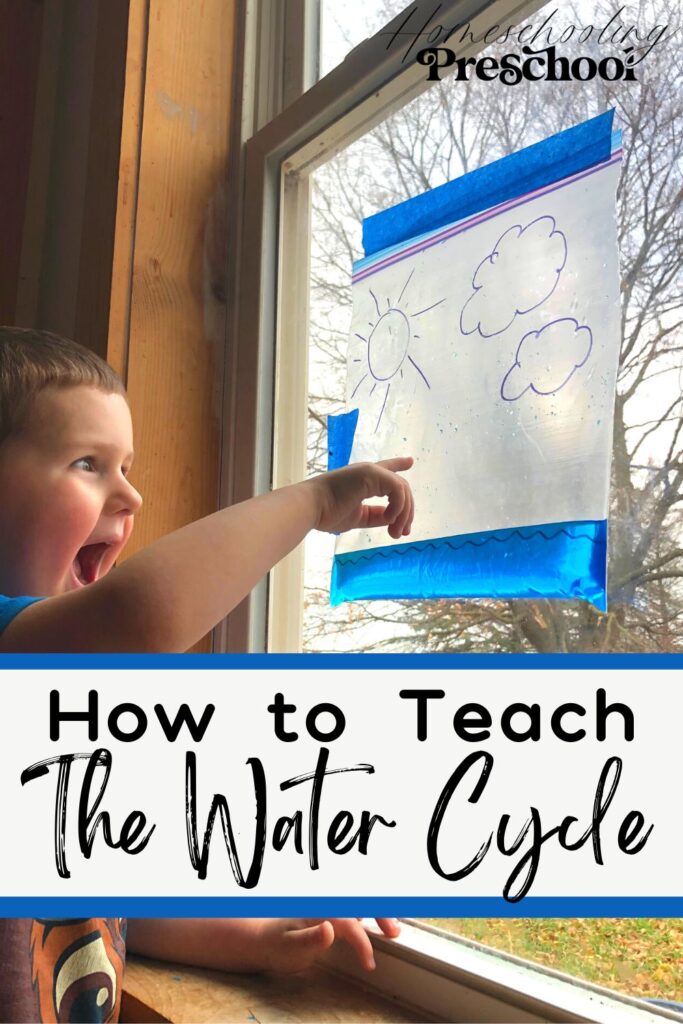
Water Cycle in a Bag
This science experiment is a simple way to teach the water cycle.
Draw a sun and clouds at the top of a gallon size baggie.
Add in waves for a water source (ocean, river, etc.) at the bottom.
Fill up the baggie with 1/2 inch to an inch of water.
Add in blue food coloring, if desired.
Tape on a sunny window and watch as the water from the water source turns into droplets when the baggie is warmed up.
The droplets then will slide back down (raining) into the water source.
How it works: The warm sunlight makes the water evaporate.
Because the baggie is sealed, the water vapor can’t get into the air.
It then turns back (condenses) into a liquid and forms droplets on the side of the bag.
The droplets rain down the side of the bag back into the water source (ocean, river, etc.).

Look at the Clouds
We know that the water evaporates into the air and then goes to the clouds.
Look at the clouds, see the differently shaped clouds, and even look at the clouds to see what they look like (a bear, a heart, a train, etc.).
By drawing attention to the clouds, you are helping your little ones to notice the clouds which are an important part of teaching the water cycle.
Play in the Water
Playing in the water can be either in the bath or in a water table.
Let your little one interact and feel the water and see how it moves.
Water play is a perfect way to start to teach the water cycle.
Watch a Puddle Evaporate
After it rains, go looking for a puddle.
Take a picture and measure how big the puddle is.
A simple way to measure is to have your little one use her feet to see how many of her feet wide (heel to toe) the puddle is.
Record what you find.
Check on the puddle daily to see what happens.
If it is a hot day, the puddle may evaporate that day!
Teach Water Cycle
Your little ones are sure to love learning about the water cycle.
Now is a great time to teach the water cycle and to have your little ones learn about the importance of conserving water.