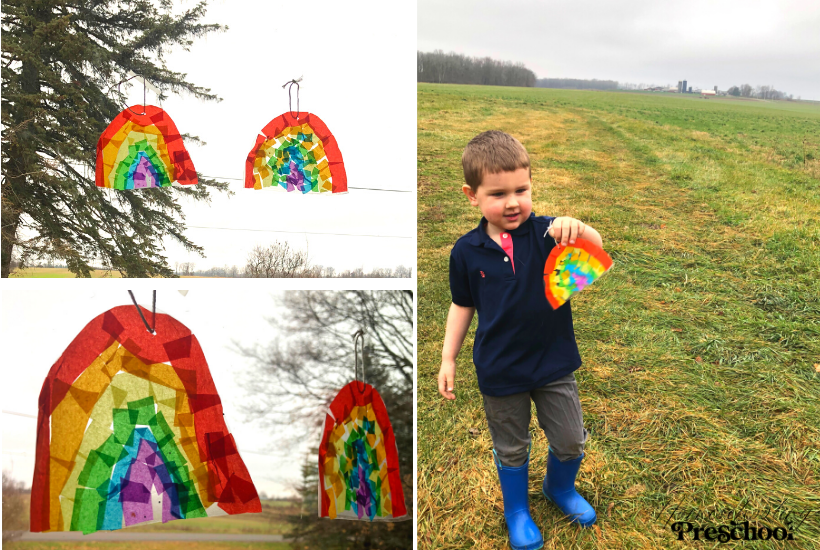
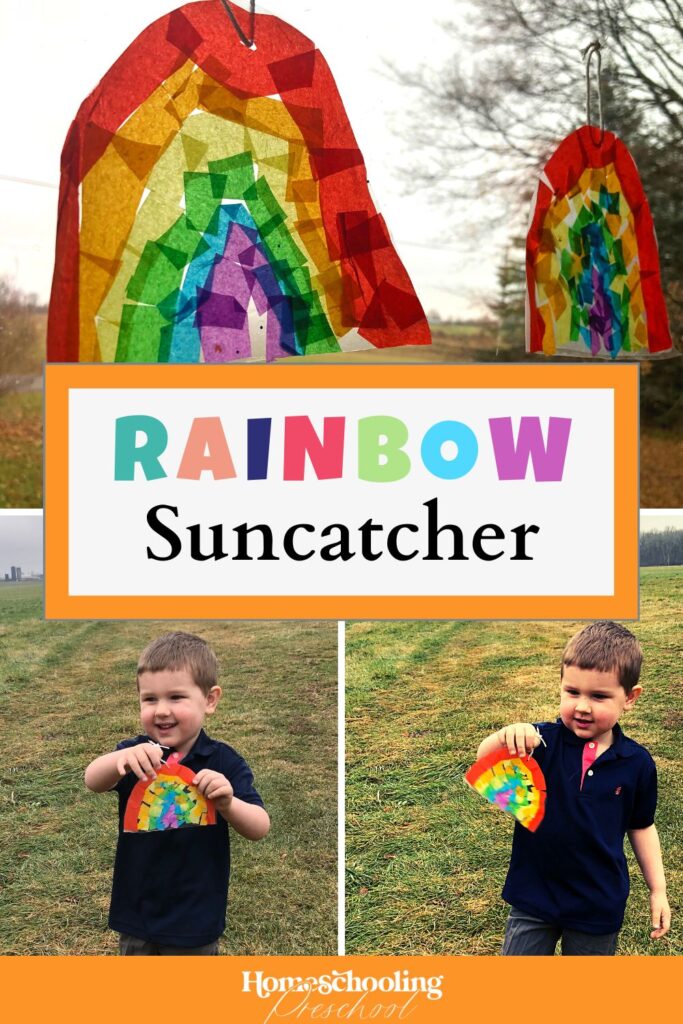
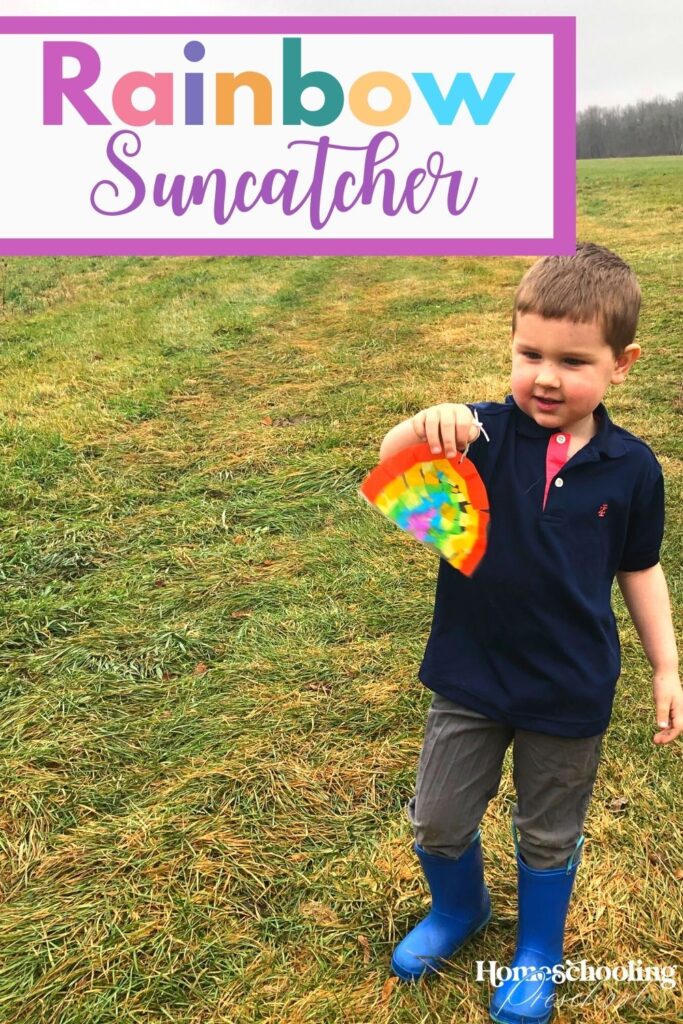
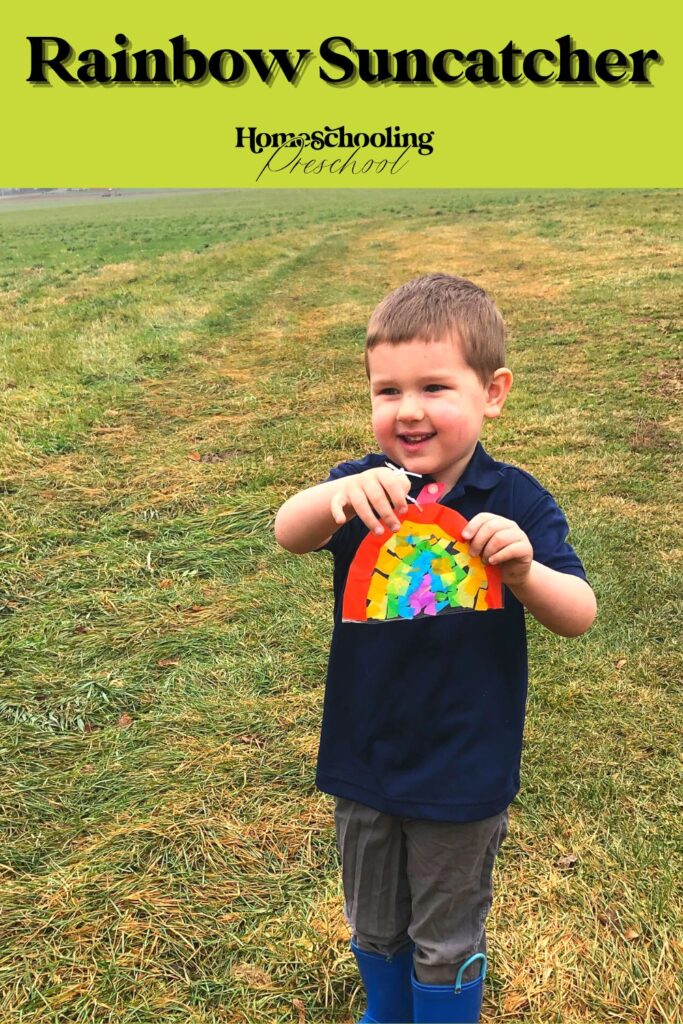
Rainbow Suncatcher Craft
Your little ones are sure to love creating this beautiful rainbow suncatcher craft.
A few simple items is all it takes!
This article may contain affiliate links to products that may help you when homeschooling preschool.
Why Make A Rainbow Suncatcher Craft
Suncatchers are a great minimal mess craft (no paint, no glue, no wait time).
This rainbow suncatcher craft requires only a few items that you probably already have at home.
Your little one will be working on the order of the rainbow as well as hand-eye coordination and fine motor skills.
If you are comfortable with it, you can even have your little one cut or rip the tissue paper into small pieces.
Talk about a craft that packs a punch!
This rainbow suncatcher craft can be used as a gift tag on a present or as a gift itself.
You, of course, could also hang it on your window to enjoy.
The idea and method of this rainbow suncatcher craft can be changed into whatever shape or thing you are learning about.
Your little one could even practice patterning with the different colored tissue paper.
Items Needed for Suncatcher Craft
-tissue paper (red, orange, yellow, green, blue, and, purple)
-scissors
-bowls (optional, but easier if you have them)
-clear contact paper
-yarn or string
-hole punch (optional)
How to Make a Rainbow Suncatcher Craft
1- Cut out a piece of contact paper that is 6 inches tall by however long your contact paper roll is (about 12 or 18 inches).
Keep the backing on the contact paper.
2- Take the red tissue paper and cut it into small squares.
You will eventually need to do this with all of the colors.
If you choose to cut all of the tissue paper at the same time you will want to have it in different bowls that your little ones don’t have access to.
3- Take your contact paper and fold it in half so that instead of being 18 inches long it is only 9 inches.
(Fold it so it looks more like a hamburger bun than a hot dog bun).
4- Peel off half of the backing paper of your contact paper.
You will cut the backing paper on the fold you just made in step 3.
5- Show your littles what an arch looks like.
You may want to call it an “upside down u”.
6- Turn your contact paper so the sticky side is facing up and so that the part that still has the paper on it is to your right.
Put the red tissue paper in a large arch starting at the edge of the part that is still covered with the backing paper.
This will be the biggest arch so make sure it is starting at the bottom of the contact paper and the top of the arch gets close to the top of your contact paper.
7- Give your little ones the bowl with orange tissue paper squares in it.
Put the orange tissue paper squares on the contact paper so that they are following the red arch.
Tell them to have the orange “touch” the red to avoid gaps in your rainbow.
8- Continue with yellow, green, blue, and purple tissue paper squares.
Be sure to take away the bowls of the colored tissue paper they are done with.
9. Peel off the remaining backing of the contact paper.
Slowly fold the contact paper over so that the tissue paper is sandwiched between the two sticky sides of the contact paper.
Press to make it stick.
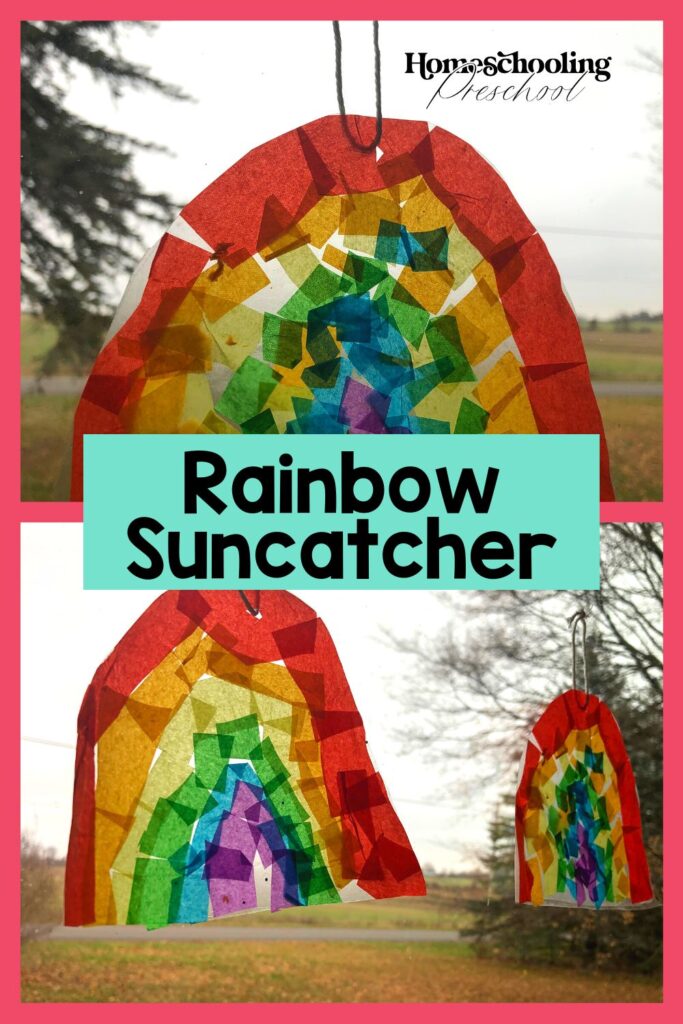
10- If desired, cut out around the rainbow.
11- Make a hole in the top of the rainbow and add a string.
12- Hang in a window and enjoy your rainbow suncatcher craft.
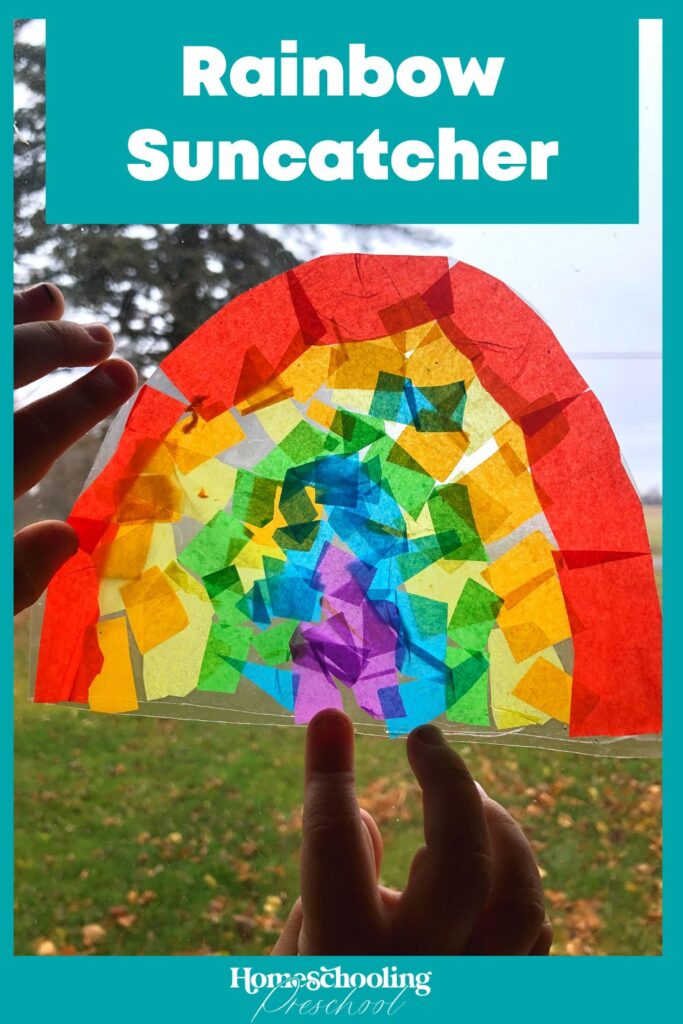
Rainbow Suncatcher Craft
Simple items are put together to make this adorable rainbow suncatcher craft.
This craft is sure to brighten anyone’s day!