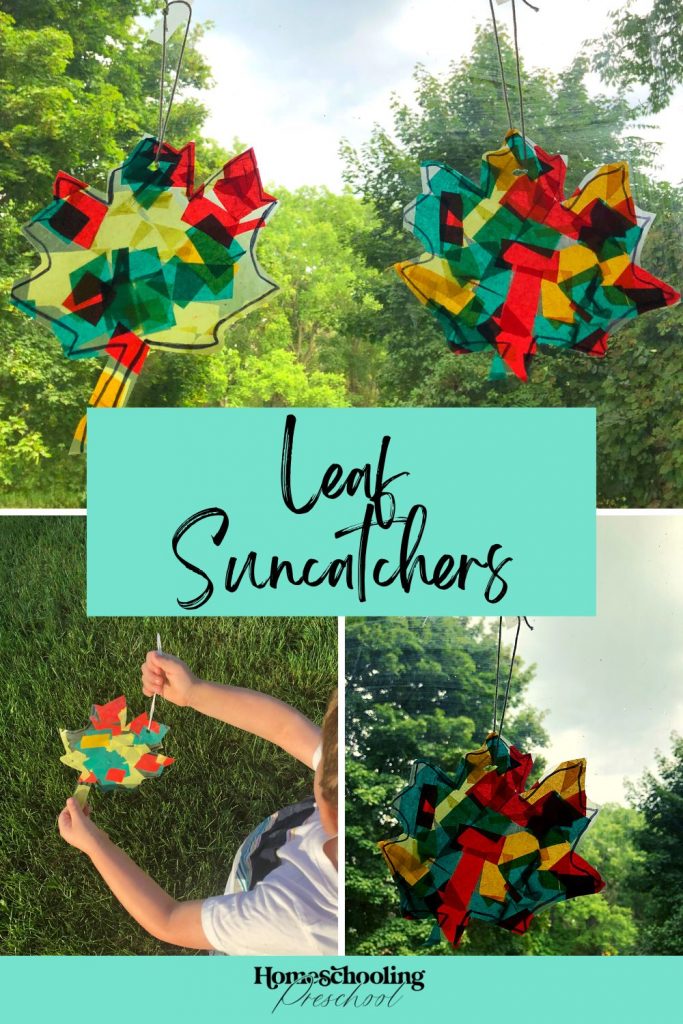
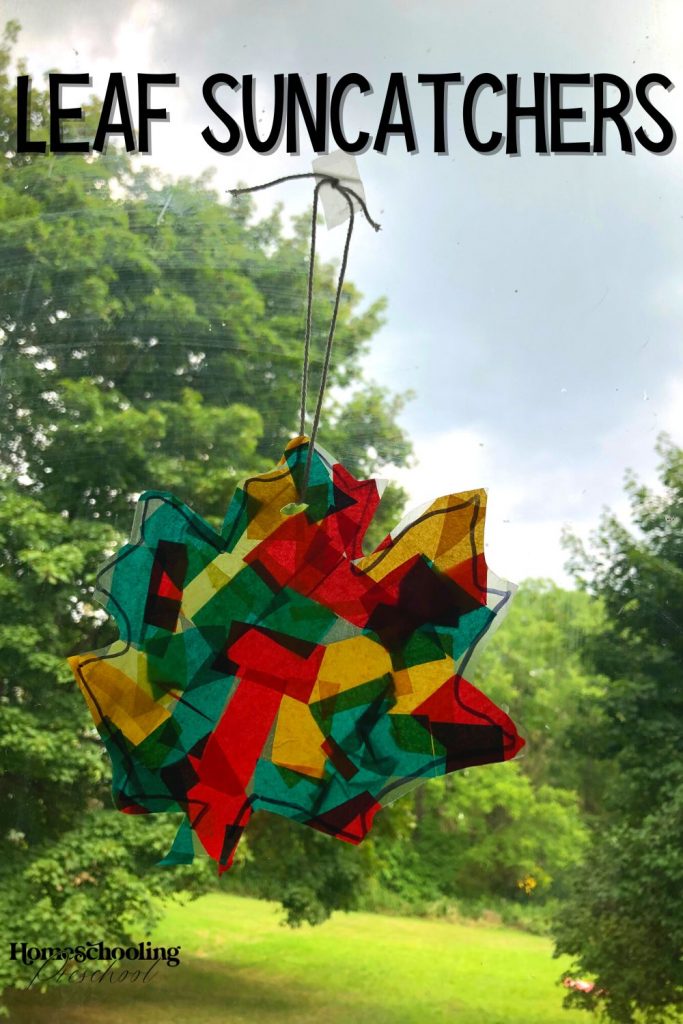
Leaf Suncatchers
Bring some color to your windows this fall.
Have your little ones make a fall suncatcher and hang it up to instantly brighten a room.
This article may contain affiliate links to products that may help you when homeschooling preschool.
Why Make a Leaf Suncatcher
No painting, melting, or glue is required for this fall suncatcher!
It is relatively mess-free.
The only thing in this craft that is making a mess is the tissue paper pieces.
This is a mom’s dream!
You can choose how involved your little one gets.
If your little one wants, she can tear the pieces of tissue paper.
If your little one isn’t interested in tearing, you can have her cut the tissue paper or you can cut them.
There are many possibilities so you can choose what works best for your preschooler.
This fall craft is fine motor galore!
Tearing or cutting the tissue paper, picking out only one square at a time, and placing the tissue paper on the leaf all work the fine motor muscles in your little one’s hands.
These muscles may be little but they are vital when it comes to tying shoes, zipping zippers, brushing teeth, and holding a pencil.
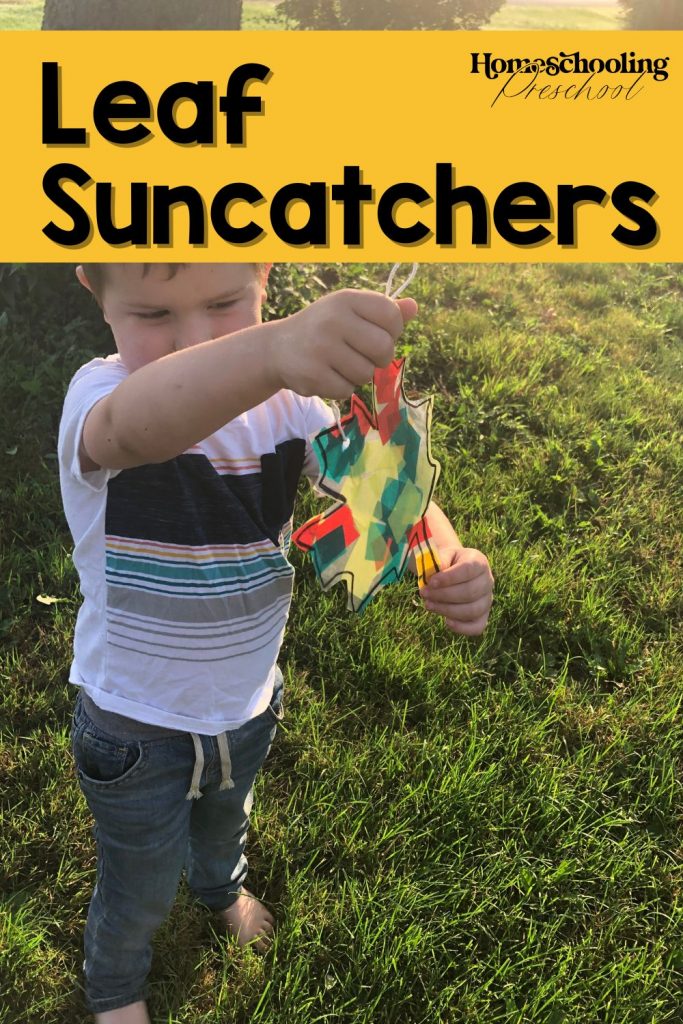
They are beautiful! The different colors used in the fall suncatchers will help to brighten your room and to bring a smile to your (and your little one’s) face.
They would also make a great gift for Auntie or Grandma.
This activity is part of our Homeschooling Preschool Curriculum.
If you are looking for more activities and books that go along with fall, check out Week 6 in our Homeschooling Preschool Curriculum.
Items Needed for Fall Suncatcher
- contact paper
- tissue paper
- black permanent marker
- scissors
- hole punch
- yarn or string
How to Make Leaf Suncatcher
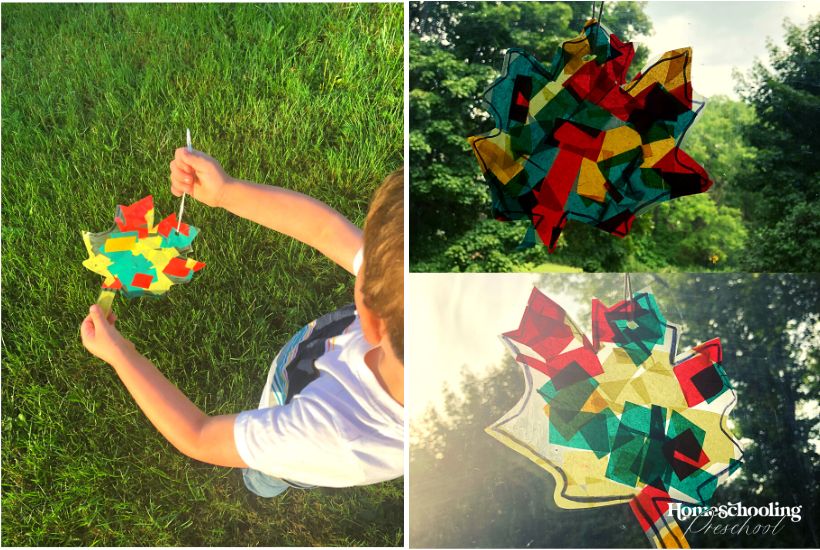
1 – Cut or tear tissue paper into small pieces.
Place in a bowl so the pieces are contained.
2 – Measure and cut out 6 inches of contact paper.
Most contact paper is labeled with measurements to help with this step.
3 – Using a black permanent marker, trace or freehand draw a leaf on half of the contact paper.
4 – Peel back the backing of the contact paper behind the leaf outline.
Keep the backing on the other half of the contact paper.
5 – Have your little one place tissue paper pieces inside of the leaf outline.
The color(s) and pattern of how the tissue paper is placed on the leaf are part of the creative process!
Let your little one do whatever her heart desires!
6 – When the leaf is covered in tissue paper peel back the rest of the backing of the contact paper.
Carefully fold over the contact paper so that the tissue paper is sandwiched between the two sticky sides of the contact paper.
7 – Cut around the outline of the leaf.
Leave about 1/2 inch around the outline so that the outline can still be seen.
8 – Hole punch a hole at the top of the leaf.
Thread a piece of yarn through the hole and tie it so the fall suncatcher can be hung.
9 – Hang in a window so the sun can catch it or give it as a gift to someone you love!
Fall Suncatcher
Your little one will love making this fall suncatcher that can easily be hung in your window with no wait time.
This craft is relatively mess-free which makes for easy clean-up, too.