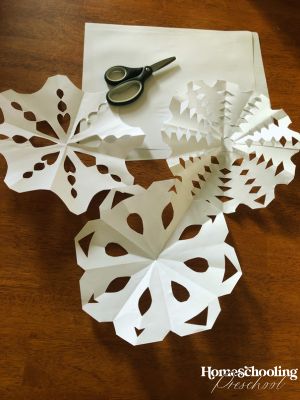
How to Make a Snowflake Out of Paper
Decorate your space with snowflakes by using this simple tutorial on how to make a snowflake. They are easy and fun to make and hang.

Why Make Paper Snowflakes
No Wrong Designs
Paper snowflakes are just as unique as their outdoor counterparts.
Each is beautiful in its own way, making it an excellent activity for kids.
But remember that scissors are sharp, and learning how to make a snowflake out of paper may not be the right activity for people just getting used to manipulating scissors.
It’s Fun
Making paper snowflakes is fun! Need we say more? 😉
Trial and Error and Visualization Takes Place
Kids can experiment with cutting out different shapes (or half shapes) and see how it turns out.
There is an element of trial and error, which is great for their brains and development.
Kids may also visualize in their heads what the snowflake will look like if specific cuts are made.

This article may contain affiliate links to products that may help you when homeschooling preschool.
Endless Opportunities to Make Snowflakes
Once kids learn how to make a snowflake out of paper, the sky is the limit (see what we did there).
Great Decorations
These snowflakes make incredible decorations for winter or a winter-themed party.
Simplified Directions
The directions below may be a bit different than some because there is an emphasis on how to make a snowflake the easy way—no need to overcomplicate this craft for your preschooler.
No rules or protractor are required for this how to make a snowflake easy tutorial 😉
Each step has a picture above it to show how the snowflake should look at each stage.

What You Will Need
- Thin paper (printer paper works great)
- Scissors
How to Make a Snowflake

1. Take an 8.5 x 11 inches of paper (standard printer paper) and fold the bottom left corner diagonally towards the top right corner.
The edge that was on the bottom should now be aligned with the right side of the paper. There should be a rectangle strip that is not covered.

2. Cut off the rectangle.

3. There should be a triangle left that is folded over.

4. Take the corner that is on the bottom and fold it up to the top corner.
The longest side (the fold) should now be folded in half.

5. Unfold the paper.
There should be a crease going down from the point of the triangle to the middle of the folded edge.

6. Take one of the corners and fold it so the folded edge lines up with the crease made in the middle of the triangle.

7. Do the same with the other side.

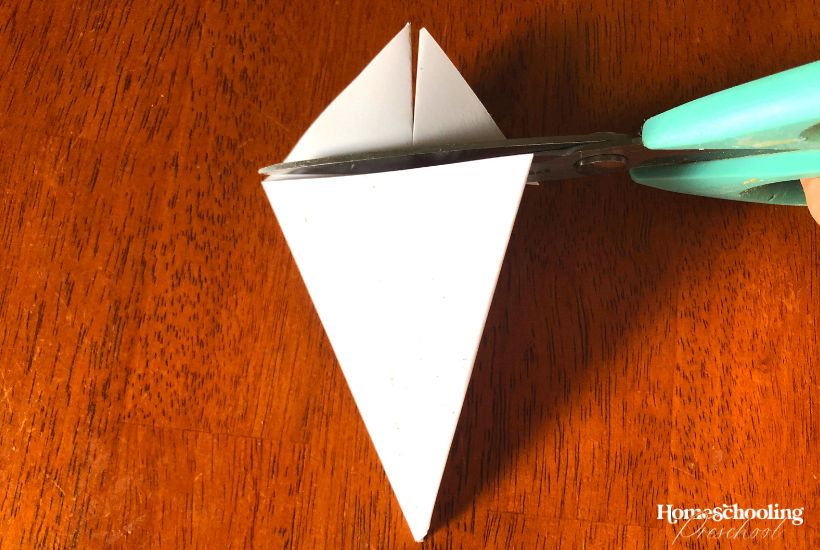
8. Keeping it folded, flip the paper over. You’ll see part of the paper sticking up over the ice cream cone shape. Cut them off.
Follow along the straight edge as you cut.

9. Cut out shapes from the sides of the paper.
Be sure not to cut the folds completely, or your snowflake won’t stay connected.
Remember that you are cutting on multiple folds, so if you want to do a heart, cut out half of a heart on the fold. The same thing goes for any shape.
10. Gently start to unfold the snowflake

11. Enjoy your beautiful snowflake
It wasn’t too hard learning how to make a snowflake, was it?

Easy Paper Snowflakes
Learning how to make a snowflake out of paper doesn’t have to be complicated. With a bit of practice, making snowflakes becomes easier and more enjoyable.