DIY Musical Instruments: Making Music with Everyday Items
Get rockin’ and rollin’ with these fun DIY musical instruments. Plus, they use recycled materials, making them free!

Why Make Music with Preschoolers
Cognitive Development
Playing a DIY musical instrument requires little ones to use their muscles and memory while they are paying attention to what is happening.
Easy rhymes and songs used with preschoolers are the perfect way to promote early literacy.
Work on Motor Skills
While little ones make and play their DIY musical instruments, they will strengthen their hand muscles (fine motor muscles) and arm muscles (gross motor muscles).
These muscle groups play an essential role in helping preschoolers move and play.
Social and Emotional Development
Being aware of the music and instruments that others are playing is a wonderful way to work on social development. Kids can collaborate on songs together (or with a grown-up).
Music tends to be a safe place for little ones to explore and show emotions. Teaching preschoolers that emotions are essential and beneficial is a crucial part of preschool.
Music can aid in expressing different emotions and helping little ones learn to communicate their feelings.
Creativity and Imagination
Music is a wonderful outlet for creativity and imagination. Encourage little ones to make up their own songs and to dance and move while they play them.
Preschoolers can explore how DIY musical instruments make sound and experiment with the instruments to make them give off different sounds.
This article may contain affiliate links to products that may help you when homeschooling preschool.
Rhythm and Movement Games to Do with DIY Musical Instruments
March to the Beat
Have little ones march around the room while creating a beat on their DIY musical instruments.
Alternatively, have one person do a beat, and another person march to the beat so their feet hit the floor while the drum (or another instrument) creates the beat.
Freeze Dance
One preschooler plays their instrument. While the instrument is being played, others dance about. When the music stops, everyone has to freeze.
Let kids (and grown-ups) take turns playing their instruments.
Echoing Rhythm
Play a rhythm on an instrument (or with your hand on your leg). Have your little one echo the rhythm using their instrument. Take turns creating the rhythm.
Feelings Songs
Play some upbeat music for your little one. Ask them how it makes them feel. Have them try to copy the music using their instrument.
Try with slower music, too.
This is the perfect time to talk about emotions and label different feelings (happy, sad, nervous, etc)
Shaker Scales
Using a shaker, start by shaking it slowly. Gradually speed up how quickly you shake it. See how fast your preschooler can shake it. Then, gradually slow down how much it is being shaken.
Call out fast, slow, loud, or quiet, and have your little one shake their shaker to match your word.
Musical Lava Floor
Kids love the game The Floor is Lava, and they are sure to love this musical twist.
If you haven’t played before, the floor turns into magical lava after someone says, “The floor is lava!”. From there, anyone on the floor must quickly get on something that isn’t the carpet (or floor). This may be a pillow, the couch, a set of ‘rocks’ you create, etc.
They have to say on these elements, out of the lava, until someone says the lava is gone or cooled.
For this musical twist, little ones play a beat on their instruments while the floor is lava. Once it is said to have cooled, they stop playing their instruments and can walk about. When the floor becomes lava again, they must seek safety and play their DIY musical instruments.
DIY Musical Instruments Using Recycled Materials Instructions
Homemade Drums
Dive into the recycle bin to find metal cans of canned vegetables or fruit. You’ll also need a balloon, a rubber band, and scissors.
1. Peel off the label on the can if you haven’t already.
2. Cut the neck off the balloon.
3. Stretch the balloon over the open end of the can.
4. Place a rubber band around the edge of the balloon to help keep it in place.
5. Decorate the outside of the drum.
6. Use sticks, colored pencils, chopsticks — anything stick-like — to make drumsticks.
7. Tap the top of the balloon to make one sound. Try tapping the side of the drum to make a different sound.
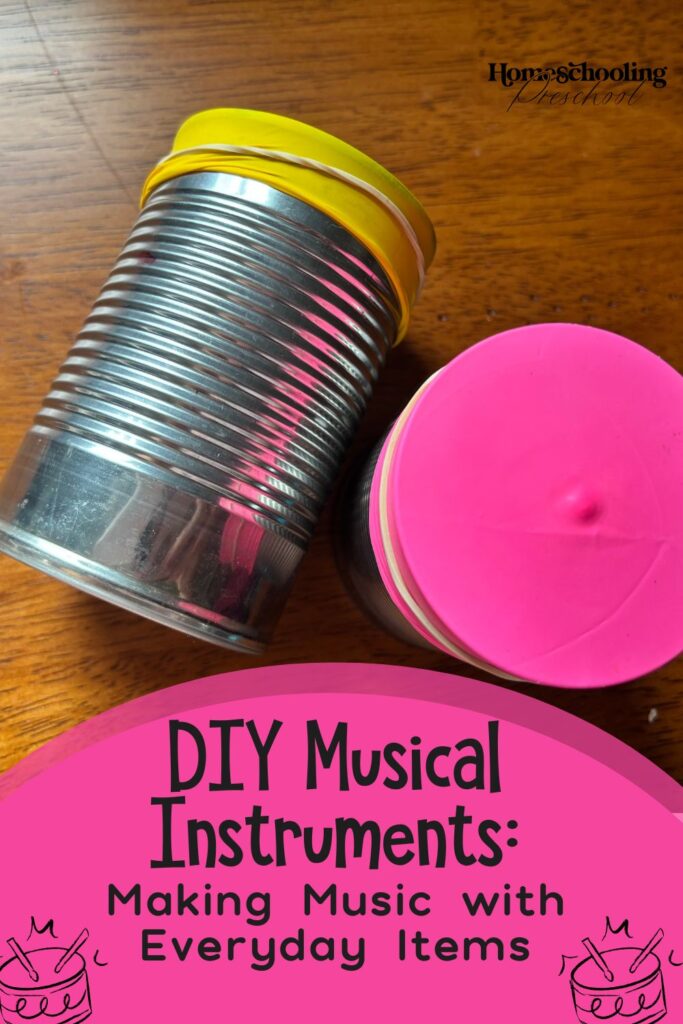
Recycled Materials Shakers
You’ll need a bowl or container, some dry beans or rice, and tape. If you can find one with a lid, that would be even better!
1. Take your container and pour dry beans or rice into it.
2. Add the lid (if you have one) and tape the lid in place.
3. If not, wrap parchment paper or aluminum foil over the opening.
4. Tape the parchment paper/aluminum foil in place so the contents can’t be poured out.
5. Let your little one decorate!
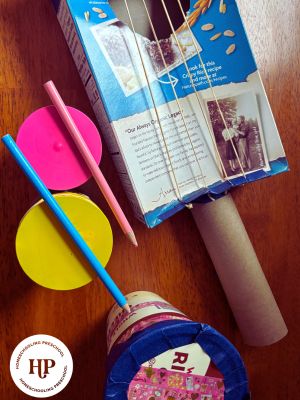
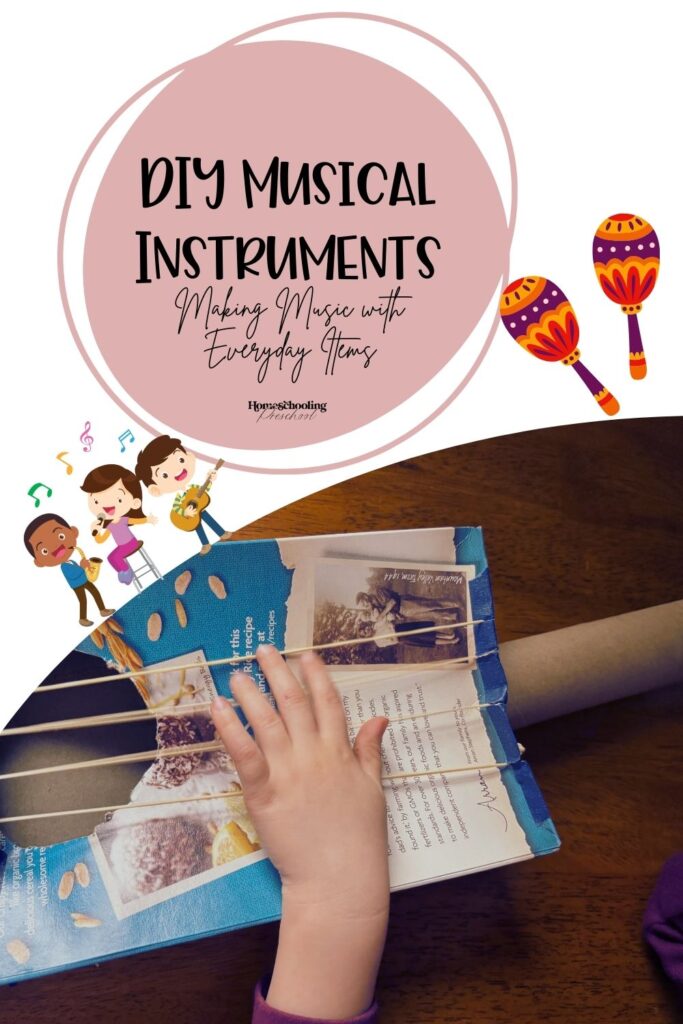
Homemade Guitars with Recycled Items
This DIY musical instrument is by far the most time-consuming.
You’ll need:
*a wide and long box (shoe box, cereal box, etc.)
*paper towel tube
*rubber bands (4 of them)
*scissors
*tape
*crayon/pencil/marker (to mark the box)
1. Place the cereal box on the table so it lies flat and the longest edges go left to right. Tape the open side of the cereal box.
2. Cut out a circle just big enough for the paper towel tube to stick in from the far right edge of the box. NOT the top of the box.
3. Stick the paper towel tube into the hole. This will make the arm part that sticks out from the guitar.
4. On the top of the box, use something circular (like the inside of a roll of painter’s tape) to make a circle near the left side of the box.
5. Cut out the circle that you drew.
6. Using scissors, make four notches close together on the left edge of the box near the circle you just cut out. Do the same thing on the right side of the box, straight across from the first set of notches.
7. Grab the rubberbands. Open the scissors, place one side of the rubber bands inside, and cut. This should make the rubber bands a long strip instead of a loop.
8. Tie knots on both ends of the rubber bands (as close to the ends as you can).
9. Place one rubber band on the top notch on the left side of the box. The knot should be on the left, and then the rubber band should thread through the cut notch.
10. Repeat with the other three rubber bands.
11. Stretch the rubber band over the big hole in the box and over to the right side of the box. The top rubber band should be placed in the top notch on the right side.
12. Repeat with the rest of the rubber bands, ensuring they aren’t crossed.
13. If desired, tape down the left side of the rubber bands to help hold them in place.
14. Enjoy playing the guitar.

Recycled Materials DIY Musical Instruments
Use up some of your recyclables with these fun DIY musical instruments. After decorating them, let your little ones devise fun new ways to use the instruments. Hopefully, they will give you (at least) a few minutes to sit down and catch your breath.


