Salt Dough Handprint Craft
Get your little ones involved in the kitchen with an easy salt dough handprint craft.
Simple ingredients and steps make this a great activity.
This article may contain affiliate links to products that may help you when homeschooling preschool.
Benefits to Making Salt Dough Handprint Crafts
Help your little ones to get acquainted with being in the kitchen and making things.
A salt dough handprint craft is a great place to introduce working in the kitchen because there are easy measurements (whole cups) and minimal ingredients.
Those fine motor muscles will be working up a storm while your little one is mixing and kneading the dough.
Fine motor skills are important for holding a toothbrush, zipping up zippers, and controlling a pencil to write.
Fine motor muscles may be tiny but they are important.
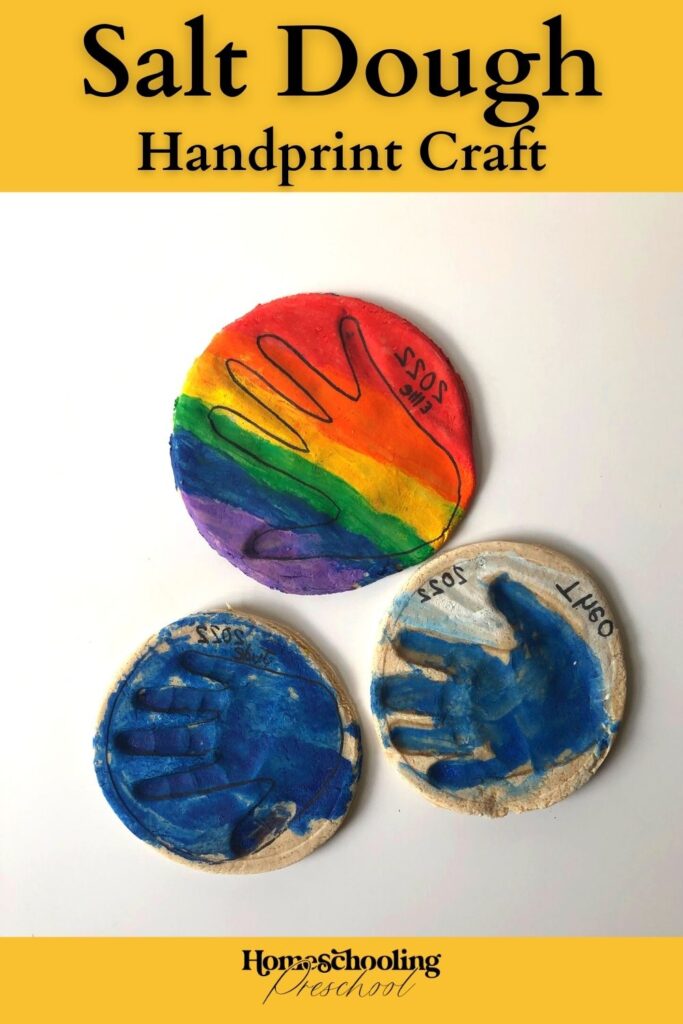
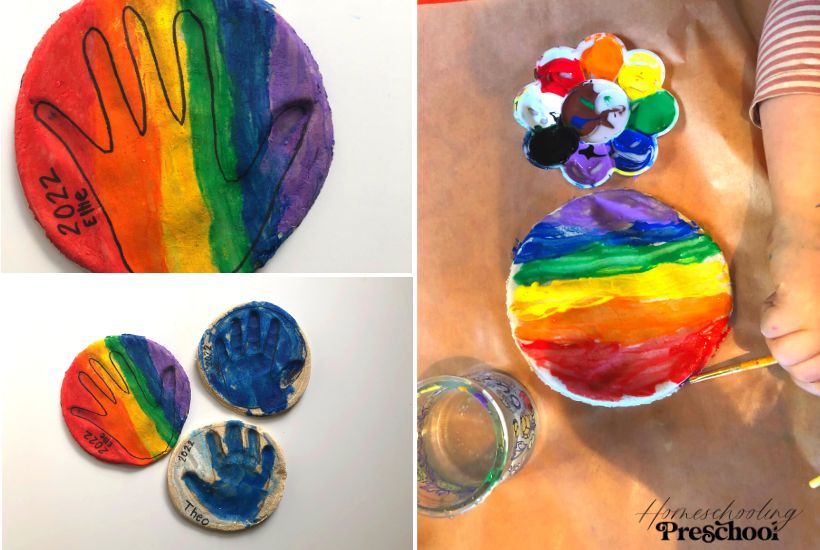
Creativity can be expressed when painting the salt dough handprint craft.
Let your littles choose the color of the paint and the design to make on the handprints.
Some kids may choose to make the handprints all one color while others may choose to add many different colors and polka dots.
You may want to outline the handprint with a permanent marker once the salt dough handprint is dry to help the handprint stand out.
Your littles will get to make something with their hands (literally) and then give it to someone as a gift.
Teaching kids from a young age to think of others is a great way to help them be empathetic.
If you want, you can add a hole (using a pen or a straw) before baking to put a ribbon through to make an ornament.

Materials Needed
-4 cups of all purpose flour
-1 cup of fine salt
-1 cup to 1 and 1/2 cups of warm water
-Mixing bowl
-Rolling Pin
-parchment paper
-baking sheet
-Something circular to trace (like a bowl)
-knife
-paint
-marker

How to Make Salt Dough Handprints
1- Mix 4 cups of flour and 1 cup of salt in a bowl.
Encourage your preschooler to help with this part (and to notice the different textures).
2- Slowly add 1 cup of warm water.
3- Work the mixture into a ball.
If needed, continue to add up to 1/2 cup of warm water to make a workable dough.
4- Knead the dough until it is soft.
This takes 5- 10 minutes.
5- Roll out your dough to a thickness of between 1/4 inch and 1/2 inch.
It doesn’t have to be exact, but keep in mind the thicker you make the dough, the longer it will take to dry.
If you make it too thin the salt dough handprint will crack easily.
*Putting the dough between two sheets of parchment paper helps the dough not to stick to your rolling pin. *
6- Have your little one spread her fingers and place her hand on the rolled-out dough.
7- PUSH! Make sure each finger and palm are firmly pushed into the dough.

8- Slowly lift the hand straight up.
9- Place your bowl upside down around the handprint and push to make an indent.
If needed, trace around the indent with a knife.
10- Transfer the handprints to a parchment-lined baking sheet.
11- Bake at 200 degrees Fahrenheit for 1-2 hours.
Flip the handprints when the top is dry.
Allow the bottom to bake.
*The time range is huge because it depends on how thick and large your salt dough handprint craft is. *
12- Keep a watchful eye and take out when both sides are dry.
13- Allow to cool.
14- Paint the handprint craft with your little one.
Once the paint has dried, outline the handprint with a permanent marker to make the handprint more visible.
Add the year and name to the salt dough handprint craft.

Salt Dough Handprint Craft
Using simple ingredients and many different muscles, your little one is sure to love making this salt dough handprint craft.
They make perfect gifts so your loved ones can always remember those little hands.